
An overview of Publisher in AC9, and publishing DWGs. Publisher in AC10 and 11 is here.
As the Archicad User Guide (2, pg 115) says,
"The Publisher function allows you to output aspects of your Virtual Building..."
Well that sentence is awful I was really hoping for more. Aspects? How about this.
Publisher saves files.
It also prints, plots, and uploads via FTP, but that doesn't concern us. (Actually, I can see the FTP thing in the hazy distance. Later.) Mostly, it saves files.
Any 'save as' operation (except archive) can be automated using Publisher. It uses the view set functionality in combination with output options to fully automate saving files. It is the completely realized successor to the hotlinked drawings function in AC7 and earlier.
What files can you save? Well,
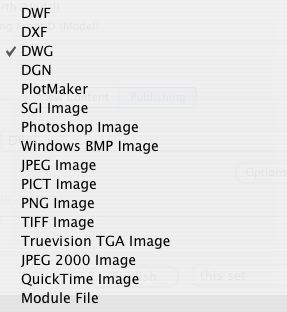
All these.
You will be primarily concerned with DWGs. Secondarily concerned with PMKs. (I use one PMK. Yes, I publish it.)
All that is needed to set up publishing is to add file saving options to view sets.
The Publisher Palette
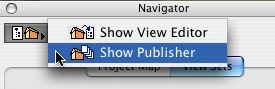
Access publisher on the file menu at File | Publisher | Publish... (Cmd+Ctrl+P), or in the navigator palette via the upper left flyout, third button.
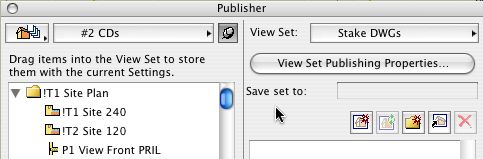
Here's what you get. I shrunk the palette to get the picture smaller; it practice make it as big as you need.
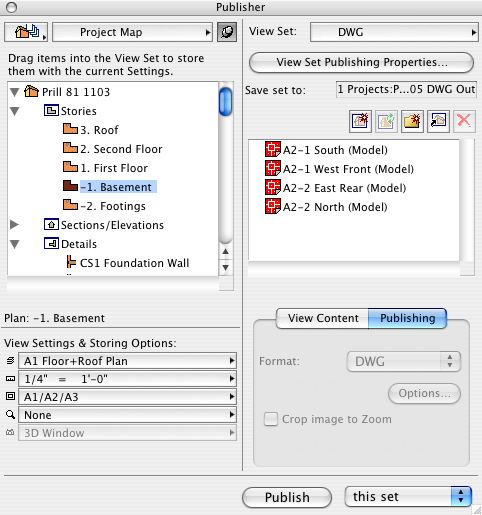
Publisher palette
A quick review of the parts.
The left panel contains the project map and view sets. Use the flyout at the top to switch between them. At the bottom are the view settings: Layers, scale, display options, zoom.
The left panel contains the current view set and publishing options. The view set flyout is very similar to the one in the navigator.
At the bottom right are the file format and options.
Example: Publishing DWGs for stake.
Let's publish a small view set for the purpose of staking the house. The set will consist of a site plan and a foundation plan.
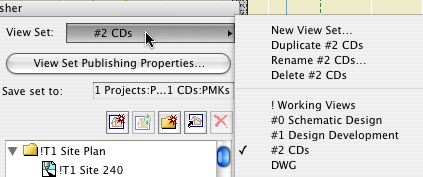
1. Create a new view set, using the top right flyout. Call it 'Stake DWGs'.
2. The publisher interface (and the view editor) allows you to copy a view from one set to another, maintaining the settings. We will assume our two plans will be the same as those in our 'CDs' view set.
Select the '#2 CDs' view set from the top left flyout. As we get ready to drag the views, the palette should look like this:
3. Select the site plan and the A1 Basement Plan, and drag them over to the right panel.
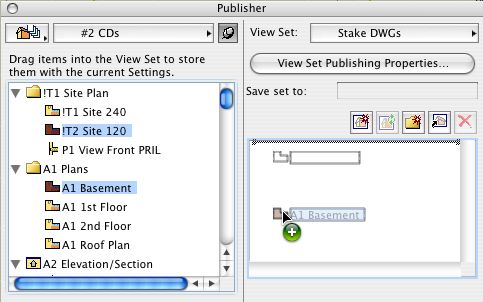
Incoming
4. The default format-of-the-week is PlotMaker (PMK). (An improvement. It used to be DXF.) This isn't what we want. Select both items, then change their format to DWG using the pulldown at the bottom right.
5. Click the Options button.
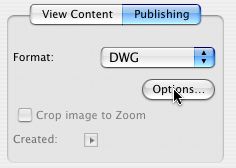
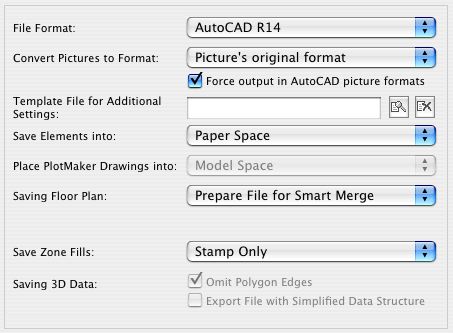
This brings up the 'DXF-DWG Translation Setup' dialog, though you'll search in vain for the name. We could probably employ a part-time person just to work on this box, so I'll just tell you what you need to know.
In the top panel you should have at least two list items, the first of which is 'Default Translator'. Choose the second one. If you only have one, highlight it and click 'Duplicate', then choose the new one.
Flip down the 'Settings in Selected Translator'. The only items we are concerned with are 'Drawing Unit' and 'Save Options'. For the unit, choose 1 foot. For the save options,
Boy this is hard post. See why it took so long? At least we don't work on AutoCAD they'd all be like this. When I can't think of a caption, sometimes I'll throw in some commentary.
Click 'Save Settings and Close'.
6. Click 'View Set Publishing Properties'. Set the options as shown.
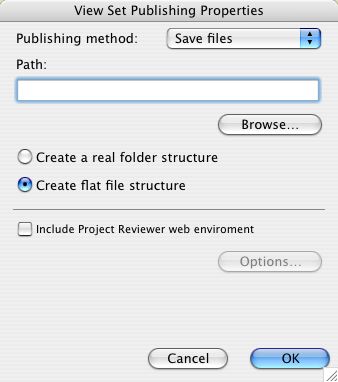
For the path, use Somebody : 05 DWG Out : Stake. Create the Stake folder.
That's it! Well, the set is done. We haven't actually published yet. That's the easy part. The point is, the set stays done, so you can publish it any time.
7. To save the files, select 'this set' or 'selected items' from the pulldown, then click 'Publish'. (I can't ethically recommend publishing 'all the sets'!)
You'll get a dialog showing the progress of the save. This set is small and quick. Like everything, it will vary.
To review, this is what is happening: For each item, the view is saved, in the format selected, at the location given in the path. This is a lot a settings in one click!
When the publication is done, click 'Close'. Go to the Finder to retrieve the files. Send them on their way. Compress them if necessary.
(Publisher creates two additional files whenever it runs. They are 'Catalog.xml' and 'index.html'. They can be trashed. Temporarily.)
See Also:
Archicad User Guide 2 pg. 115
Publisher: PMKs