
In framing plans, it's often helpful to show the walls on stories below with dashed lines. Especially roof framing. Well how do you do that.
Ingredients:
• A wide, white pen. In the templates it's pen 130, 0.8 mm, light red like pen 60. In the AC11 templates, it will be pen 40.
• A fill made of diagonal lines, scale independent. In the templates it's 'Dasher', with a tile spacing of 10 pt each way.
• A layer, +S Wall Hatcher.
• A layer combination, S3 Structure Wall Mask, which shows only the plan walls and the hatch layer above.
• Saved views with this LC and the S (structure) display option combination.
The fill tile spacing controls the size of the dash. The pen weight controls the size of the gap. You can tweak both of them to your liking. Since the fill is diagonal, it will cross horizontal and vertical walls the same way. If part of your plan is rotated, you'll need to rotate the fill accordingly. If parts of the plan are parallel to the hatch, you'll need multiple fills in different directions.
Place Dasher fills on top of the walls you want to appear in the framing above. Bring them to the front. Use a solid white fill to mask the walls you don't want to see. I use pen 20 for the solid fill so I can tell the two fills apart easily.
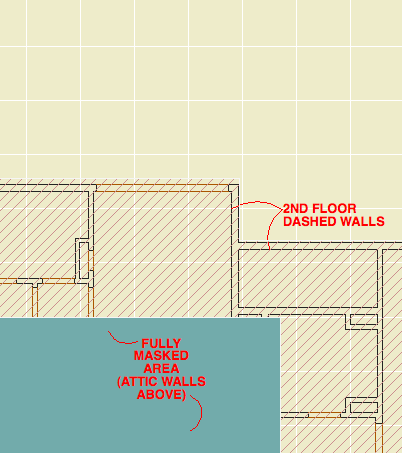
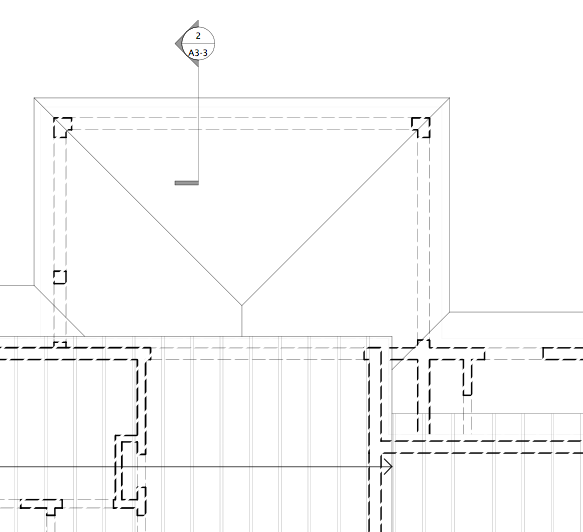
In this example, I'm putting the main roof framing on the attic plan. The attic walls will be unbroken, and the second floor walls will be dashed.
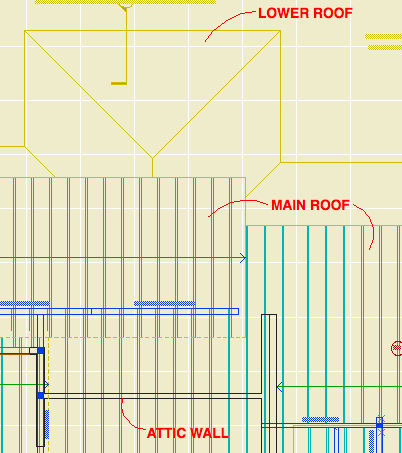
Framing plan without dashed walls
Here's the fill work on the second floor:
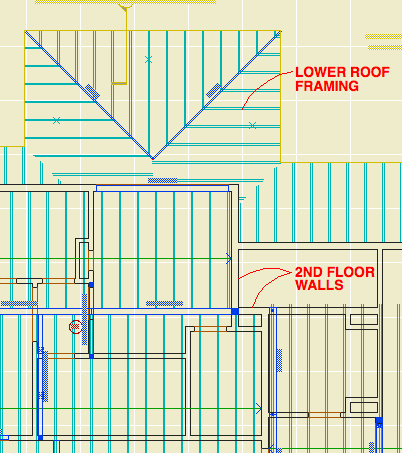
The project has several one-story parts, whose roof framing will be shown on the second floor. Here the second floor walls are solid, and the first floor walls are dashed.
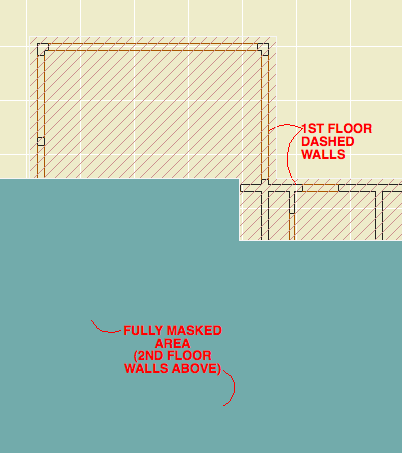
Only the one-story areas are covered with the Dasher fill, the rest (inside) is solid.
The masked plans aren't of much use by themselves. The trick is to place the masked plans behind the regular framing plan in the layout. Import the plans from the 'Structure Wall Hatch' folder within the CDs view set. Send the masked plan to the back, and line it up normally.
You can even place multiple masked plans, to show the first and second floors below, if all the roof framing is in one drawing. Just take care with the stack order of the drawings. This shot of a PDF shows first and second floor walls:
The great thing about this method is that it's mostly live, which advances unity. The dashed lines are the actual walls, not 2D lines. I say 'mostly' because if you move the walls a lot you might have to tune up the edges of the fills. It's still easier than maintaining lines.