Location: 06 Wood & Plastic
One, or many, rafter tails or pergola elements. A huge improvement over Rafter Tails HOOV8.

Stock is the size of the board. There are presets for 2x and 4x members. You can also choose to have a custom size, which unlocks the Width and Thickness parameters.
Arrangement can be Single, Spread, Distribute, or Distribute -1.
Single places one rafter. Spread places one rafter at each Spacing distance. With the Spread arrangement, you can opt to turn on the End Rafter. (Note: The end rafter is built beyond the end of the object length.)
With the Distribute arrangement, the rafters are spaced evenly between the ends, so their spacing is not greater than the Max Spacing. Distribute -1 is the same, except the last rafter is omitted.
The slope angle can be set by choosing a Roof Slope from the list, or by entering a Custom Slope. If the custom slope matches a preset slope, the roof slope parameter will reflect that.
(I am gradually standardizing all the roof-slope-related objects to use the same slope parameters.)
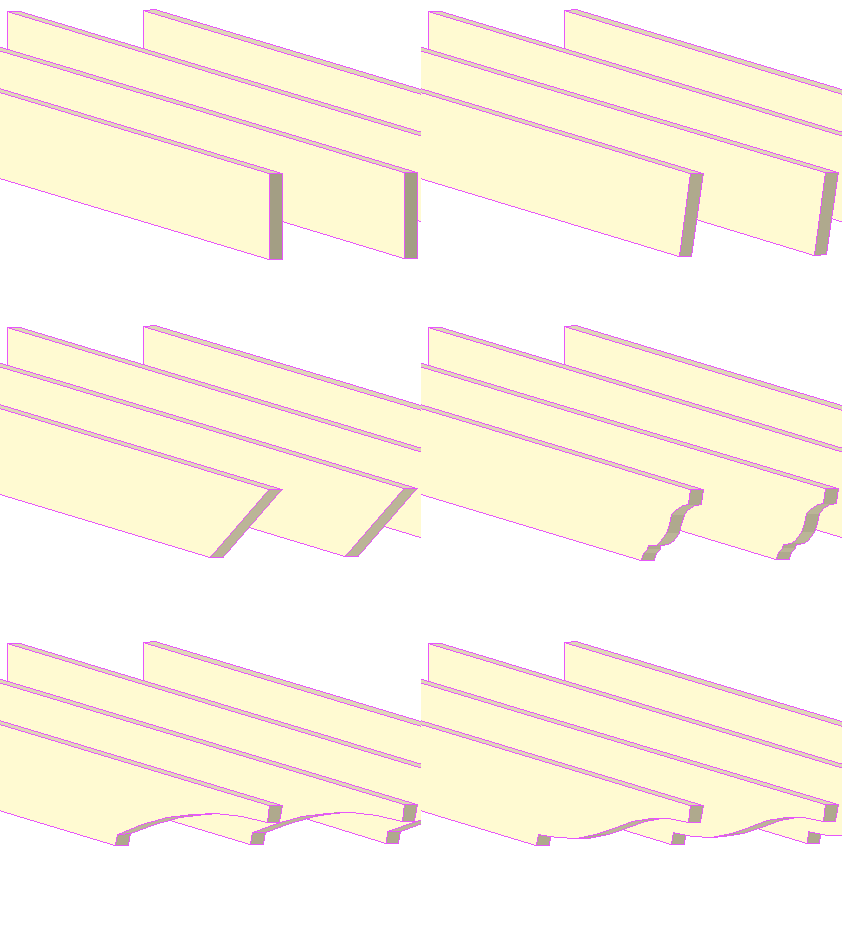
There are six choices for the End Condition: Vertical, Perpendicular, Cutback, Crown Profile, Arc, and S Curve.
Vertical and Perpendicular should be obvious. Cutback cuts the rafter past perpendicular by the Cutback Distance.
Crown Profile puts a crown shape on the end. The shape is scaled to fit the width of the board.
Arc cuts an arc into the end, between the Notch Height at the bottom and the Nose Height at the top. The length of the arc is the Cutback Distance. S Curve uses the same parameters, but cuts an S shape.
If the Roof Slope is Flat, you can have the End Condition at both ends by turning on Shape Both Ends. Good for pergola parts. This option isn't available when the rafters are sloped.
The whole object can be 'mitered' to accommodate hips and valleys. The Start and End can each have a Cut Angle of less than 90 degrees. The default is to set the angle from the Top corners, but you can set it from the Bottom to cut the rafters the other way. The start and end angles are editable in plan.
In plan, you can choose to show the rafters with a custom linetype (probably dashed) and pen on stories below. You can also use a custom pen for stories above; maybe pergola elements should be shown lighter on higher stories.
Update: Turn on the Cover Fill to make the pieces opaque (White, pen 91). Useful for roof plans of a pergola. Stories below will not show the fill.
