On Land

Environment Information
At Rill Architects we run ArchiCAD on macOS. If you work at Rill, this is your stuff. If you don't, but you work in ArchiCAD, you may find something interesting. Anybody else, I don't know.
RSS
Tips Archive

If you search Google for a simple question with a concrete, factual answer, it will give that answer ahead of all the usual links.

For example, I just put in 'how many square feet in an acre' and got '1 acre = 43 560 square feet'. Thanks, that's what I needed, bye. Other recent applications include comparing the land areas of Maryland and El Salvador. El Salvador is twice as big. And the Earth weighs 5.98x1024 kilos.

Sheet A2-1
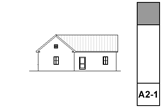
S/E Status (Model/Drawing). It is just really strongly recommended that all building elevations and sections be model views. Developing model sections is a little harder than elevations, but anyone can do it with practice.

I usually keep S/E's set to Auto-rebuild.

S/E Element Placement. Marker ends should not extend too far beyond the building itself. Our section elements go on a non-printing layer, and we use a separate object to show the section locations in plan. This is because it is difficult to reconcile the extent of the cut with the desired graphic presentation of the markers. That is, To get the markers looking nice you need have them much more extensive than is required to create the view itself.

Cut sections using the section marker Plain Section JAM9. This simple marker just shows the ID and a flag to indicate direction.

Elevations should be as close to the building as possible; the marker should be stepped where necessary to achieve this. Watch out for eaves and gutters.

Sections often require a lot of tweaking to get them to cut through interesting/clear/consistent stuff on all stories. Watch for undesirable effects of stepping with respect to roofs. Where a section cut is perpendicular to a roof's slope, try to avoid stepping the section within that roof. If you can't avoid it, discontinuities in the roof can be patched, but the patch becomes a maintenance issue if you edit the S/E element again.

Section depth should be minimized in order to improve performance. The depth should reach only the most distant element you want to see; usually it's a ridge or a chimney. Infinite depth sections should never be used. Zero-depth sections come in handy sometimes for generating details, but building and wall sections should always have some depth. Section depths are typically off in display options; toggle them using Karl's marvelous add-on.

Layers. All annotations go on the layer +A Arch Note Reg Scale. This includes text, arcs and splines used for leaders, and notation objects. All added 2D work should go on +A Misc Line, but this is not a critical issue. Since S/E windows usually only generate a single view, layer discipline is not as important as in the plan. You should, however, make consistent use of the Arch Note layer, to maintain the option of turning the notes off to display the S/E image by itself.

Vectorial hatching.

Elevation (and 3D) hatching is generated by the 'Vectorial Hatching' setting of the material in Options -> Attribute Settings -> Materials. The pen of the hatching should typically be 150, which is light gray.

Display of the hatching is a setting in the model tab of the S/E element itself. Hatching slows down generation considerably; in typical use it should be off. Before publishing, turn the hatching on for all the markers by selecting all of them and checking the box in the info box. The hatching switch setting is not saved with views, which is too bad.

Unwanted lines.

Ugly bits which are complex can be patched. To hide simple cases of a few unwanted lines, use a fill which matches the vectorial hatching of the elements involved (shingles, stone, etc.), and has an opaque background. For blank walls you can use a solid fill of a white-printing pen. I use 80, which is purple, so I can see the areas I've masked. Masking fills and patches should go on the layer +A Misc Line. The use of masking elements becomes a maintenance issue.

Rendering of depth.

Foreground elements should be outlined with a heavy (5-weight) polyline. There is no reliable way to do this automatically, it's tedious. One tip: for symmetrical building parts, outline one half and then mirror. Another: Outlines can often be copied and pasted to the opposite-facing elevation and mirrored across the origin.

Use Marked Distant Area where appropriate. When using it, check 'Use One Pen' and use pen 30. Pen 30 is gray in AC and 1-weight black in PM. You need section depths on in display options to edit the MDA depth. Don't forget the shortcut.

When you combine outlining with MDA, you get three levels of rendering: Fills on and outlined, fills on with no outline, and fills off.

Model pens. Except for walls and objects, elements are drawn in 3D with their floor plan pens. Walls have a dedicated 3D pen, which should be a 3-weight. (Typical walls are 13.) Objects can have a separate 3D pen, either as a parameter or hard-coded, this will vary. It is a long-standing wish that all elements have a separate 3D pen.

The ground. The ground mesh section settings should be: Fill='Air Space'; Background pen=91; Cut pen=6-weight. (I like green land, so 36.) These settings give an invisible fill with a heavy ground line. The bottom and side lines of the mesh should be obscured by the object Grade Mask JAM8, which goes on the +A Misc Line layer.

Annotations.

Elevation notes. The main materials and building elements should be noted. This includes wall finishes, trim parts, decorative columns, panels, railings, chimneys, etc. To align the notes, use the object Note Column JAM9, in the drawing tools folder. Notes on the right side should be left-justified with the leaders starting at the first line. Notes on the left side should be right-justified with the leaders starting at the end of the last line.

It is permissible to fully annotate one elevation on each sheet, and then only point out unusual features on other drawings on the same sheet.

Levels. Use the object 'Elev Marker JAM8'. Elevation views should show the Z-height of each story. It is helpful to draw a dotted (not dashed) line through he elevation at each floor level. Dotted lines need to be heavy in order to be visible; use a 4- or 5-weight. In sections, levels should be should be shown for ceilings as well as floors, and for interior floor level changes (such as garage slabs). Level objects will auto-display their Y position, which is the height. They should be dimensioned to show the relationships among them.

Knee wall heights should be dimensioned in section.

In sections, unusual ceiling or floor conditions may be labeled with Slab Elev JM9. Examples: Lowered ceilings in small rooms, a stepped slab in a theater.

Roof pitches should be noted in section and elevation with the label Roof Slope JAM9.

Doors and windows should be labeled with Door-Window Label JAM9.

Structural members in section should be labeled with Description JAM9. Joists are shown 2D-only using 'Joists Sect 2D JAM9'. Our standards don't support modeling the joists.

If you drag a dimension string, the texts will re-center themselves on their segments, assuming the texts have not been moved manually.

You don't actually have to drag the string anywhere, just a drag and a double-click will do it.

The only way a dim text would be off center without you moving it is if you customized the text.

Who cares? You, because you probably changed some texts to read EQ or something, and re-centering them by hand is a cumulative chore.

So, after changing the texts to read whatever, (deselect the texts,) select the string, Cmd+D, clickclick. Note: if the dimension tool is active (very likely), you have to do a Drag command; cursor-drag will edit the witness line length. You can drag with the arrow tool and it works; I think the Cmd+D method is better since you don't have to be precise. Any texts that you moved manually will stay put. AC remembers which those are.

I just dimensioned all the Vassos ceiling lights on the electrical plan, which, if you've never had the pleasure, boils down to a LOT of EQ EQ EQ EQ EQ. So I was really happy with this discovery.

Sort of cross-posted here.

(Originally posted here. Added examples.)

Here is the Geometry Methods info box tile.


Geometry Methods are the ways of making a shape with a tool. The 'GMs' are only available in the info box, not in the settings. You can switch geometry methods in any tool by typing G.

The first button is one click placement. The object will be created with the default X, Y, and rotation. Example: A recessed light fixture, since it's not stretchy and it doesn't matter how it's rotated.

Second is rotated placement. Two clicks. First is anchor point, second is angle. X & Y will be the defaults. Examples: Anything that you would turn to face a certain direction. A lot of things. Sinks. Light switches. Sconces. Centerline symbols.

Third is rectangle placement. Two clicks. First is anchor point. Second is the diagonally opposite point. The same method is available for polygons (slabs, fills, etc.) Not all objects will be placable this way; only stretchy* ones. By this method you can graphically set X & Y, but you can't give values. Example: Crown Tool in coffer mode.

*Interlude: Stretchiness. Objects are stretchy if they have hotspots in their 2D scripts at the 0, A, & B extents, OR "Hotspots on bounding box" is on in their "Details". Don't worry about this now. An example of a stretchy object is Bed 01 in the Furniture folder. The only way to know if an object is stretchy is to try it, or look in the script. Most rectangular objects should be stretchy.

For "stretchy" placement to work, you have to have a corner set as the insertion node in the settings. If a non-stretchy node (e.g., the center) is the insertion node, you get one-click simple placement. In the plan preview window in the object settings, the insertion node has a box around it. You can choose a different insertion node there by clicking on it.

Tip: When you Option-click (pick up settings) on an object, the node you clicked becomes the insertion node.

The fourth button is rotated rectangle. Three clicks. First is the anchor point. Second is angle AND length of first side (X). Third is length of second side (Y). Example: Crown tool coffer in a rotated space. The same method is available for polygons. If a non-stretchy node (e.g., the center) is the insertion node, you get two-click rotated placement.

The key is not to get hung up on "rotated". I use this method all the time for non-rotated polygons, because you can use R to set the length of both sides on the fly. Example: counter slabs. When placing an object such as a bathtub this way, you need to know which way the object goes; X is first, Y is second. If you do it backwards you get the drain on the long side.

If an object is "linear", only stretchable in one direction, stretchy placement still works. If using rotated placement (4th), the second click only sets the angle, and the third click sets the length. Using the fourth button with a linear object enables you to draw it very much like you would a line. Examples: Lots. Drawing title, crown tool in straight mode, steel and wood beams, cut lines. Sometimes it's hard to predict which side of the "line" an object will be drawn; if it's wrong just mirror it.

Choosing the right geometry method saves a lot of after-rotating and -stretching, and is therefore much faster.

You can magic-wand a zone stamp to place a polygon using the geometry of the zone itself. It works even if the zone polygon is hidden, and saves you the trouble of finding an edge, since zone edges tend to coincide with lots of other stuff. Magic-wanding the middle of a room is often impractical due to interference of other lines.

Handy for finish-floor slabs, lower-the-ceiling-in-one-room slabs, floor material fills, etc. Just make sure your zones are updated first.

Cross-posted here.

I was going to patch up this post, but I decided to do a new one. The old one is mostly right, I just wanted to add...

• In AC9, there is a menu command for Create Independent Detail. That means you can have a shortcut for it. In our keyboard setup, it's Ctrl+D. (What. Oh. Tools menu. Please don't do it that way. I hate menus.) Also nice, when you create an independent detail, it opens automatically.

• For some reason, most of my projects open new independent details at absurdly zoomed-out views. Like the window is a million feet across. I can't fix this, it's not stored in the prefs. It's always a good idea to work near the origin. You can zoom to the origin quickly by placing an object there and then doing a fit it window.

• Wall sections should be Sections. It's so clear to me now.

• IDs. They still need to be unique, but the ID will now take up to 31 characters, so you can be very non-cryptic. You can have spaces, though I don't use them. I like it to be clear that the first word is the ID. To review, use the ID to say what type of detail is in there, with a number so maintain uniqueness. Use the name for a fuller description. Eave1 Typical, Eave2 Shed, Eave3 Porch.

I have been drawing all the engineering details myself, based on their sketches. I keep these separate by beginning all their IDs with "S_".

• Detail markers: For areas, use Detail Area JAM9. For flags, use Detail Flag JAM81. These markers show the ID in Archicad and the drawing/sheet number in PM layouts. For assemblies, use Assembly Marker JAM81. This marker maintains the ID, which is the same as the (non-autotext) drawing number in each assembly detail. It also gives the sheet number, which is automatic. I have developed the habit of putting my schedules and assemblies on sheet A3-1, so they stay put as sheets are added.

• Remember you can open a detail from any marker, not just the original one.

• The biggest hassle with the detail tool is the fact that you can't put a detail marker in a detail window. Maybe someday. If you need to call out a detail within a detail, use an object. Remember the autotext referencing hack.

Once I put up that screenshot of the detail marker, I noticed that the gibberish components of the two autotexts are the same. The difference lies in the DRAWINGNUMBER_R and LAYOUTNUMBER_R tags at the front.

This means I can have reference markers (section and detail flags) that just need to be told the gibberish segment once, and can build the autotexts themselves. For these objects, instead of copying the entire autotext in PlotMaker, just copy the data within the second pair of angle brackets: "<9BEA5D4E-8700-11D8-8AA9-000A95A7B33A>".

I have added this ability to Detail Area JAM9. In the settings, paste the gibberish into the "Paste Autotext Here" field. In the drawing and layout number fields above, you will see the completed autotext fill in. You can still put non-auto text in these fields; if you delete the "Pasted" data, the fields will empty and unlock, and you can use them however you want.

I redrew the "Flagstone Random" fill pattern, in an attempt to get it to redraw faster in vectorial. I cut the number of lines by about 50%. There are now only 1700 lines in a 10' x 6' rectangle.

It's a little faster. Not as much as I expected, but every little bit yada yada.

If you want to try it, you can pull it from the Vassos project using Attribute Manager. Here's the before and after:


I think the new one looks better too.

If no one complains I will replace the fill in the templates in a little while.

I was happily (!?!) putting in the rake mouldings for the gambrels on Vassos. On the sixth one, the outer rake failed to subtract from the steep roof of the gambrel. All the others had worked. Imagine my joy when I saw that all five previous subtractions at the same condition had also failed.

The "solution" is to slightly change the edge angle of the upper roof edge. In my case, the angle of the edge when mitered to the upper roof was 74.3651º. I rounded up to the nearest hundredth of a degree, to 74.3700º. To keep the section through the miter looking presentable, I had to change the adjacent edge angle of the upper roof.

Over time I have have seen these subtractions continue to deteriorate, and I have to change the angles again. It's a pain, but there is no other way to model complex rakes.

Update: This issue is greatly improved in 10 and in the later patches of 9.

Remember that it's very easy to drag drawings between layouts while in Tree by Subsets view.

If you have a big pile of new drawings (details, interior elevations) destined for multiple sheets, import them all at once into one layout. Then distribute them by dragging them in the tree.

Q
When I paste elements, is there a way to select those elements?

A
Complete the paste. Undo (Cmd+Z). Redo (Cmd+Shift+Z).

Q
Working in section, is there a way to reveal selected elements in plan?

A
Yes.

Q
How can I tell what elements were affected by a marquee stretch?

A
Undo, redo. The affected elements are selected. Current story only, natch.

When an editing action is undone, the edited element will typically be selected. Comes in handy.

It's slow to open the settings dialog when you can use the info box.

It's slow to choose File -> Save rather than typing Cmd+S.

It's slow to choose File -> Merge rather than typing Opt+M.

It's slow to hunt down the close button at the top of a window rather than typing Cmd+W. However: it's slow to bring a window to the foreground so you can close it, if you can click its close button in the background.

It's starfish-slow to choose Edit -> Copy, choose Options -> Stories -> Go Up A Story, choose Edit -> Paste, rather than holding down Cmd and typing C, 6, V.

It's canyon-formation-slow to choose Tools -> Display Order -> Bring Forward, Tools -> Display Order -> Bring Forward, Tools -> Display Order -> Bring Forward, Tools -> Display Order -> Bring Forward, rather than holding down Ctrl and typing 6, 6, 6, 6.

It's slow to right-click and choose Undo, right-click and choose Undo, right-click and choose Undo, right-click and choose Undo, right-click and choose Undo, rather than holding down Cmd and typing Z, Z, Z, Z, Z.

It's slow to drag windows around until you see the one you want rather than use Exposé.

It's slow to go to Display Options when you can use this.

It's slow to go to the Project Map, scroll to the Details part, right-click on it, and choose New Independent Detail, rather than typing Ctrl+D.

It's slow to right-click and choose Open Section/Elevation, or Last Section/Elevation, but unfortunately we don't have a choice.