On Land

Environment Information
At Rill Architects we run ArchiCAD on macOS. If you work at Rill, this is your stuff. If you don't, but you work in ArchiCAD, you may find something interesting. Anybody else, I don't know.
RSS
October 2004 Archive

This post ties together all the AC9 posts.

Overall AC9 is very much like AC8. Superficially it is almost identical. The changes primarily concern interface and performance.

Performance means it runs faster and better. Interface means:

• Selection is improved. Quick Selection lets you select virtually any element without finding a detectable edge or node. Escape deselects. (Without a deselect function, that QS thing would be a very mixed blessing.) Cmd-Shift restores the old caps lock functionality, letting you 'scroll' through a pile of coincident elements. Objects can have detectable edges. Select with a box under any tool by holding down Shift. To select with a box over a QS-able element, hold down Shift and the spacebar.

• Less switching between tools. The unified pet palettes mean it doesn't matter which tool is active, and the palette commands work better. There are also polyline/polygon editing improvements

• You can switch objects without all the settings reverting to default. There's a search field in the Object (etc.) Settings dialog.

• The Work Environment is much easier to customize, save, distribute, restore. We have toolbars, yay.

Interface changes may seem superficial, but together the whole working experience has been smoothed out and is much more efficient.

There are a few welcome tool improvements. We finally have cover fills on model polygons. The Text tool is utterly transformed. Optional section rebuild is nice, but be careful. Dimension settings is one of those things that's deadly boring until it bites you, so it's good that views now take them into account.

PlotMaker is still PlotMaker, poor thing.

That's all the big stuff. You should peruse the New Features Guide, which is in PDF format on the installation CD, and at 3 Resources : Documentation.

I would have called it 3.2. Others have suggested 3.5. A few very charitable souls say 4.0 would be OK.

9 it's not. To me having the version number the same implies functional parity with Archicad, which makes me laugh, but only to keep from crying.

There are precious few interface improvements. One I do appreciate: In Drawing Usage, drawings on the active layout are shown bold. It also has toolbars, and I use the one with Print and Plot on it so I don't have to keep the various interpretations of Cmd+P straight.

The performance of importing drawings is noticeably better, and that is always welcome.

Other than that, it's still a hillbilly. Dragging a copy is still different, the marquee is still different, no split, no adjust, no Info Box, bla bla !@#$% bla.

So let me be the first to dash your hopes that the '9' signifies anything at all. Sorry.

PS, that hotspot glitch, where the hotspots go dumb after you stretch a frame? Not fixed. You can't believe it either!

The installation process is pretty ordinary. The eye candy is a nice touch. I just want to point a couple things out.

Anywhere in the instructions where it talks about removing the hardware key, ignore it. (Leave the key in.)

It doesn't matter whether you do the key update or the installation first. Obviously 9 won't actually run until you do the update.

You can do 'Typical' installation. The 'Custom' option doesn't allow enough customization anymore, so skip it.

The default install location is now Applications -> Graphisoft, rather than Applications. I'm leaving it there.

I think desktop shortcuts are stupid. If you agree, remember to uncheck the boxes about them at the end of the install. Dock shortcuts are naturally superior.

The documentation PDFs don't install automatically. After the installation finishes, copy the 'Graphisoft Documentation' folder from the CD to the new Archicad 9 folder, within Applications -> Graphisoft. Change the name to simply 'Documentation', or the docs won't show up in the help menu.

The first time you open AC9 it will look weird until you fix your Work Environment.

AC9 gives the option of Windows-style toolbars. I am among the least excited about this feature, since I think mousing around clicking on things is a waste of time when you can use the keyboard, which unfortunately isn't always.

It is my responsibility to point the feature out, and you may do with it what you wish. It is possible to build a toolbar from scratch for just the things you really need, which sounds like good idea, but not good enough to actually do it yet.

I use the Attributes toolbar,


...but only because they broke my keyboard scheme for Attributes.

I also have the Window Switcher in my palette scheme,


... which sort of gives you access to all the windows in the project, except it has crippled detail and section lists, and I haven't really developed the habit of using it.

Toolbars can be turned on and off at Window Menu -> Toolbar Display. You can customize toolbars in the Work Environment. The display and position of toolbars is saved with the Palettes scheme.

Like the new Text tool, the Work Environment is too complex for me to give an exhaustive treatment here. Refer to page 147 of the manual, or page 80 of the New Features Guide, for the full story. Briefly:

All of the user-related options in Archicad and PlotMaker have been gathered together under the Work Environment, accessible on the Options menu. (Shift+Ctrl+~) This includes the keyboard shortcuts, the palette shapes and positions, the toolbox layout, the toolbars, the info box, even the menus themselves.

In addition to having these settings organized, and having more interface elements customizable, all of the environment settings can be saved and imported, making it very easy to set up the environment when a new version comes out, or if you have to delete the preferences.

I have set up a work environment which represents my best efforts at customization through the beta period. You should import this environment when you begin to work in AC9.

(Everything about importing the Work Environment also applies to beginning in PlotMaker.)

To import the environment:

1. Go to Options -> Work Environment. Click 'Import'. Click 'Browse' and navigate to 3 Resources (the Onion) -> Work Environment -> RND Profile.

2. Back in the Import dialog, select the profile and click 'Import'. You should now see 'RND Profile' in the Stored Profiles list.

3. Double-click the 'RND Profile' profile. This applies the schemes of the profile.

4. With the 'RND Profile' profile highlighted, click 'Set as Default'.

You can customize any of the environment components you like. A few thoughts:

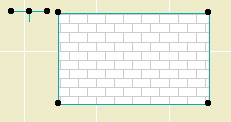
� The palette arrangement is for a 23" Cinema Display. It will be a few more days until everybody has one, so some palette experimentation is probably in order. Palette layout is also a very subjective area where reasonable people may disagree. My only tip is that it is better to make an arrangement and stick with it rather than constantly push things around. After you arrange palettes, click the green button on the 2D and 3D windows to get them to conform to the palette positions. Then resize the windows how you like.

� Please refrain from deleting keyboard shortcuts. AC9 has the option of having multiple shortcuts for a single command, so if you want to try something new, just add it rather than replacing.

� More on keyboard shortcuts (Yes, it is one of my favorite topics.): AC9 finally allows the use of the F1-F15 keys on the Mac. We've lived without them for so long that it's hard to know how to react. I have the group switch on F1 and the ghost story display on F2, in addition (see above) to the old Opt+G and Cmd+8. Beyond that I don't know.

� Customizing menus looks like a massive time sink. It does give me another opportunity to say, don't waste your time going to menus, use the keyboard. I have not customized my menus at all, because by and large I don't know or care where on a menu a command is, because I rarely get them that way.

� Don't mess with the Info Box. I have invested a fair amount of time in refining it, and the result is the definitive optimization, probably in the world. Serious! Ask to see the spreadsheet. It is designed to be vertical, one tile wide, long enough to show all the tiles on the most complex tool. (You have to guess.) If/when pushing palettes around, keep the Info Box in this shape.

If you make changes in a scheme: In order to get the changes to stick you have to highlight the top level of that scheme, then highlight your scheme name on the right and click 'Redefine'. Example: You modify shortcuts under 'Keyboard Shortcuts', but to save the changes you have to highlight 'Shortcut Schemes'.

Cover fills are the long, long, long-awaited ability of model polygons (slabs, roofs, meshes, zones) to display fills in plan.


A roof and nothing but a roof.

This going to mean a lot less drawing over things to show fills and to get elements to hide one another.

Cover fills have all of the features of regular fills, including background pen, local origin, and rotation. Roofs can automatically rotate the fill pattern to align with the roof slope. You can set the cover fill to be the same as the vectorial hatching on the 3D material.

Display of cover fills is controlled by a new display option.


Selecting 'No Fills' puts the model polygons the way they were in AC8.1.

Notice that there are now a total of three fill display options. Further, 'Polygon Fills' has become 'Drafting Fills' and 'Construction Fills' has become 'Cut Fills'.

The distinction between Cover, Cut, and Drafting fills is called the Fill Category. You need to be aware of this because you can actually draft a cut or cover fill, which will display according to the relevant display option.

In Options -> Fill Types, you can limit the categories a fill can be used for. For example, shingles can't be used for cut fills.

Since you can set the category in the fill settings, and not all fills can be used for every category, you may find in a certain case that some fills are "missing". If so, check that the fill category in the settings is "drafting".


Fill Category in Info Box

AC9 brings the ability to save views with different dimension settings. The most prominent example would be the desire to dimension plans with feet & fractional inches, and site plans with decimal feet. Now you don't have to switch dimension settings back and forth, or explode dimensions, or other such tedium.

To make it easier to maintain the dimension settings, we use the long-standing, little-noticed Dimension Standards.


"Standards" in Dimension Preferences

There are two standards which we use in our views. "Site" is used for site plans. "Plan" is used for everything else. You could also set a standard for details if you wanted to display smaller fractions.

The view sets in the templates are configured to use the appropriate standard. For running projects, you will have to redefine your site plan views. Set the "Site" standard in the dimension settings, then redefine the view. (It's just like changing the scale or the layers.) Your plans should be OK, but it never hurts to check.

So now, views save scale, layers, display options, zoom, and dimension standard.

The GDL implementation in AC9 adds the option for the object designer to make edges detectable in plan for the purpose of selection.


Detecting Cutline JAM9

This ability can be added to any line or arc. I'm working it into the libraries gradually, going for maximum convenience and minimum nuisance. In addition the cutline above, all the JAM9 trim tools are detectable by the front edge. This should make easier to select trims, which tend to coincide a lot. I am listening for suggestions.

Look closely at the image above and you will see that the special snap points (midpoint, etc.) show up on these edges.

Remember that this is only for detection. There's no polyline editing ability. You can use such edges for splitting and adjusting, but not Cmd+clicking. (Yes, I reported that.)

Text editing in AC9 is completely overhauled, one of the few features that is.


Different.

The changes to the text tool are too great for me to cover here. Generally, it is more like editing in Word. All of the typical variations in text are available, and the shortcuts for bold (Cmd+B), etc., work as they should. You can mix any text effects within a single text element. Cmd+A works to select all the text when editing a block. Text can be stretched and expanded. Text can be copied and pasted from Word, with complex formatting preserved.

Text blocks can also have an outline box, and a background color, and you can control the offset of the text to the block edge.

It's a lot of stuff. If they had styles they would be done.

You should look over the section in the manual about the new Text, which starts on page 306, and/or the section in the New Features Guide, page 74.

Here's a couple of minor improvements to the polygon and polyline editing palettes.

At a polygon edge, there is one new button that always appears, and another that appears in a particular situation.


Polygon Edge Palette

The third button turns an edge into a curve, using a tangent instead a point on the curve.

The fifth button turns a chamfered corner into a pointed corner. It will only appear when you click on an edge between two other edges that would converge at a point outside the polygon. Example: turning an octagon into a square.

If you select a polyline and click on the end node, you get a palette with the third button shown here.


Add to polyline

If you click on this button, you can add nodes to the polyline. Good feature, half-implemented: You can only add straight segments. Sigh.

In AC9, the pet palettes for the arrow tool transformation functions and the element-specific editing functions have been combined. This is awesome.

Here's the Mesh palette:


In past versions, there was one palette which came up under the arrow tool, which had the dragging, mirroring, etc. buttons. Then for each tool there was a different palette which had the buttons for moving a node, curving an edge, filleting, etc. Now, regardless of whether you have the the arrow tool on, an expanded palette appears which has all the buttons of both groups.

This smoothes out the whole editing process because there's a lot less switching to the arrow tool and back.

They also improved the transformation (rotate, etc.) functions of the palette. Now you might actually use them. If you select rotate or mirror, you can select the base point for the transformation, like with the regular command. In 8.1, these palette functions would take as the base point the point where the palette came up, making them IMHO useless.

Shift-click accumulates selection. (I know shift-click accumulates selection! I know that!)

Prior to Archicad 8.0, the shift-click functionality could be modified by activating Caps Lock. With Caps Lock active, shift-clicking on unselected elements would select the clicked-on element and deselect all others. This was invaluable in getting a particular element out of a pile. But it made newbies cry so they got rid of it. (I was typing, notes, with all caps, an-and, then I went to uh, uh, uh, select, something, an-and, caps lock was still on, an-and, uh, uh, uh, the selection didn't accumulate, an-and, I had to move my left hand a quarter inch, to, to, to, turn caps lock off!!! MMMWAAAAAHHHHH!!!!)

In AC9, they have restored the functionality, while throwing the newbies a bone by not using the caps lock key to do it.

If you hold down Command along with shift, the selection will rotate through the elements at that point. With a particular tool active, it will rotate through the elements of that type. Don't forget Quick Select!