On Land

Environment Information
At Rill Architects we run ArchiCAD on macOS. If you work at Rill, this is your stuff. If you don't, but you work in ArchiCAD, you may find something interesting. Anybody else, I don't know.
RSS
New In 10 Archive
LCF Folder
Archicad 10 offers a new all-in-one library file format, the Library Container File or LCF. In Archicad 9, you could use a PLA archive file as a library. LCFs are pure library stuff, with no model space or attributes.

It is allegedly faster to load the libraries as a single large file than from folders full of folders full of individual objects. But I must say in my informal testing I haven't observed a dramatic difference among loading library folders, PLAs, and LCFs.

In addition, there's at least one characteristic of LCFs (and archives) that is disadvantageous. You can't save objects into them. So no new objects and no editing. (You could view this as an advantage from a standards point of view; nobody can mess anything up.)

In other words I considered using an LCF for the Rill & Decker Standard LIB but decided against it. There's no change in everyday library management.

But! There's a huge advantage to the LCF in one specific case: Copying libraries to a flash drive to take them home. The R&D library is about 15MB. Copying its 1300 or so items to a USB 2.0 drive takes over two minutes. Copying the same library as a 15MB LCF takes, drum roll, three seconds.

It also takes the guesswork or other syncing strategies out of keeping your home copy of the library up to date. Just bring the LCF home and overwrite the old file.

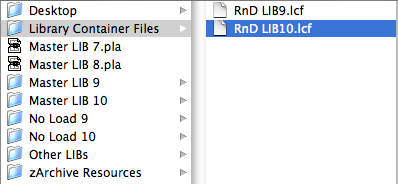
So I'm providing the library as an LCF for this purpose. The file lives at 2 Libraries / Library Container Files. I will do my best to update it when anything important changes. This is pretty often, so make sure you check it regularly.

You still need to manage project libraries manually.

In Archicad 10, sections can automatically show story level markers and lines. They are feature-limited but I think they're worth using.

More»

Automatic titles are not new to 10, but title objects are new, and now that they are objects, we can use them, which is new.

A drawing title is essentially a marker for a drawing element. Like section markers, detail markers, symbol labels, and door/window markers, you choose the title from a popup menu rather than from an object-type browser.

Drawing title list

As with all markers, there's no way to restrict the list. It shows all the loaded drawing titles, and it's up to you to pick the right one.

Elevations, sections, site plans, and details should all use automatic titles. Plans are the only drawing which has an object (Plan Title RND10) in the window. PDFs placed for notes ordinarily shouldn't have a title. Scanned details might, it depends.

Since the title and its settings are part of the drawing element's settings, you can change them in groups using the Drawing Manager. (Note: You must have a layout as the frontmost window to do this; otherwise the title tab is grayed out.)

Drawing Title RND10a is very similar to Drawing Title RND9a. There's a couple of 10-specific changes:

• By default, the title uses the name of the drawing (which should come from the name of the view, which should come from the name of the window). You can put in a custom text under the 'Title' tab in the drawing settings dialog.

• Titles don't have a length parameter like a regular object. So the Length parameter controls the length. You would normally adjust this graphically:

Title stretch

The length still has a minimum equal to the title text length.

Again I have to apologize for issuing a '10a' revision. There was one issue with Drawing Title RND10 that I couldn't fix in place. That title would appear right on the corner by default. The new one appears 3/8" below the corner, which makes it easier to move the title as needed. Note the 'move marker' palette button:

Drawing drag

And, full disclosure, I broke the minimum length thing, but now that's fixed.

UPDATE 2007-12-11:

• You can set the Orientation of the title. You can have the title rotate to align with the Drawing (default), the Layout, or a Custom Angle. Use the Layout option to keep the title horizontal when you rotate a drawing. This is optional, and it's not always right. For example, if you rotate a wall section to fit on the sheet, the title should rotate too. I can't think of a purpose for Custom Angle, but it wasn't hard to put in there. If you do ever use it, the angle is graphically editable.

• You can choose a manual scale from a list. Leave the field empty to use the drawing's true scale. This is usually correct. To show no scale text, choose 'blank' from the list. You need to set a manual scale for a scanned detail PDF; now you can choose it from a list.

In which I tilt at the windmill of Floor Plan Cut Plane, Relative Floor Plan Range, Automatic show-on-story, projection... It's not pretty. I mean, it's so pretty! You should read it!

This is some of the stuff I was keeping from you when we discussed roofs in plan.

More»

When they mashed up PlotMaker with Archicad, they had to make views-in-layouts into proper elements, rather than flaky PM things. So we have the Drawing element, which can be edited as a polygon, assigned favorites, and given a marker, all of which makes the mashed up AC views-in-layouts much more pleasant than their ancestors.

But drawings aren't just for views; You can use them for PDFs. They're not just for layouts; you can place them in any model window.

DWG Drag
And finally, you can use them to place DWGs. Rather than opening or XREFing the DWG, you can drag and drop it from the Finder directly into a model window, where it becomes a drawing. If you just need a DWG for tracing or reference, this is the way.

When you drop the drawing, the only question you have to answer concerns the units. Use 1 inch. If the drawing is 12 times too small (I think that's how it works), drop it again and choose 1 foot.

A few other points:

• A big advantage of the drawing method is there's no layer contamination.

• Drawings placed in this way can be updated, just like view drawings, and will appear in the drawing manager.

• The drawing will come in with the default settings of the drawing tool (though there will be no title). As for the pen set, use '*Layout', which is overwhelmingly black and works for most DWGs.

• If you're placing DWGs for use in output, more pen management is likely in order, which is another topic.

• Tip: Put the drawing on a remote story and set that story to ghost. Now you can work normally without accidentally selecting the DWG.

Archicad 10 offers the ability to place a live drawing list, which will automatically list the sheets in the set. It works, for the most part, with a little tweaking.

More»

Archicad 10 finally gives us the ability to place PDF files in layouts, as well as other project windows.

PDF-in-layout will become the standard method of placing non-Archicad info in drawing sets. Any file (Word doc, spreadsheet, etc.) can be saved as a PDF via OS X's Print PDF facility. In the current templates, the abbreviations and general notes are PDFs. It's the new stickyback.

Since you can place PDFs as model windows too, you may find it more convenient to use PDFs for topo surveys, plats, and the like.

PDFs become drawing elements. Since drawings are polygons, you can crop the PDF however you like with the pet palette.

There are several methods for placing PDFs, in rough order of convenience:

• Drag the PDF file from the Finder into the Archicad window.

• Use the Drawing tool. Click where you want the file to land.

In a layout window, you get the 'Place Drawing' dialog. Choose 'External Source' and then 'Browse'. Navigate to the file you want.

In a model window, you can only place an external drawing, so you immediately get the Open dialog, where you can choose the file.

• File -> External Content -> Place External Drawing. Select the drawing in the dialog box. (Least convenient method IMO.)

Whatever method you use, you can only place one page of a PDF at a time. If the PDF has multiple pages, you will get a dialog box where you can choose the correct page. To place multiple pages requires multiple drawing elements.

Since they're drawings, they can have titles, but they usually shouldn't, right? Make sure the title is set to 'None'.

Like all external drawings, PDFs will be Manual Update by default. If you modify or re-save the PDF, remember to update the drawing. I don't recommend setting external drawings to Auto Update.

If you take the project file off the network (home, e.g.), you will get a warning that the source file for the PDF can't be found. This is usually not a problem. The drawing will still appear, you just can't update it. When the project is reunited with the network, the warning will go away, and you can update the drawing as needed. (Note the similarity to Hotlinked Module behavior.)

A subtle but powerful feature tweak in AC10 is the addition of the 'Previous' option for ghost story display. Very simply, it shows the last story you were on as ghost.

Now you can go back and forth between the basement and first floor, e.g., while always keeping the other story in sight.

Here's a somewhat lateral tip. Use previous to show either the story above or below without using the Stories or Go To Story dialog at all. To show the story above as ghost, just go up and then immediately down (Cmd+6, 5). For the story below, down then up. Very quick, and habit-forming.

The AC9 Display Options dialog had two divisions. 'Options for Display Only' only affect screen appearance. 'Options for Display and Output' also affect the printed output.

In 10, these two groups are entirely separated, even to the point of appearing on different menus.

'Options for Display Only' no longer has a dialog box. They become the items on the menu View -> On-Screen View Options. They are unchanged except:

• 'True line weight' is an on-screen option. It is not saved with views, and is not reflected in printing. (In the new Print dialog, there is an option for 'Hairline'. I can't see using that very often.)

• There are two layout-specific options, 'Drawing Frames' and 'Master Items on Layout'. I would always have those on, I think.

There are also toolbar buttons available for these settings, which is nice. (Though it's sad day for Karl's QuickDisplay thing.) I recommend buttons for the section depth, line weight, and vectorial fill settings.

'Options for Display and Output' becomes 'Model View Options' at Document -> Set Model View -> Model View Options. You can also select Display Model View Options combinations from this menu.

There aren't any new options, but there is a new, spectacularly improved dialog box, and they've added the ability to import and export MVO combinations, similar to the Work Environment.

The Model View Options are the ones saved with views.

Editing in section has taken a big step forward, but it still isn't finished.

You can:

• Stretch most things in height.

• Stretch walls and beams in length.

• Edit the slope of roofs. And sloping beams, columns, and walls.

These interactions use palette buttons, identical to the 3D window.

You still can't:

• Stretch objects in height. What a total, falling-down, drunken blunder.

• Perform conventional roof trims.

• Move slab or roof edges. Or edit roof edge angles.

• Copy elements other than openings.

Essentially, they are bringing 3D window editing methods to the section window. An unfortunate, but tolerable, side-effect of this is that we have lost the 'box' method of stretching doors and windows. You have to stretch the height and width separately.

AC10 explicitly supports running more than one instance of AC at a time. In fact, in certain situations you have to. Like pen sets, this is a case where a mandatory technical change has a lot of secondary benefits.

More»