On Land

Environment Information
At Rill Architects we run ArchiCAD on macOS. If you work at Rill, this is your stuff. If you don't, but you work in ArchiCAD, you may find something interesting. Anybody else, I don't know.
RSS
Calculation Archive

This is a simple method for calculating gross floor area of a project, using the element schedule feature of AC10. It also gives us an introduction to basic element schedule technique.

The method assumes a tolerance for approximation; you need something to say when they ask, how big is it. If you need precision, you can figure it out I'm sure.

This schedule is provided in the templates, and it can be imported from 3 Resources/AC/Element Schedules. Or you could build it from scratch quite easily.

More»

The Element Information palette is accessed at Window -> Palettes -> Element Information. It's a palette; it will hang around until you dismiss it, like Find & Select or the solid elements thing, whatever ridiculous name it has.

Element Information
It gives ID and dimensional data about selected elements. The data is read-only, i.e., not editable. But it's wickedly thorough, maybe even complete. It comes in handy.

There are six sections of data, each activated by one of the buttons. Any or all of the buttons can be active at once. They are:

Properties: ID, layer, and story. This is the only place you can directly read the home story of an element. I don't know why this has to be such a secret.

Size: 2D dimensions. Lengths, widths, and/or 'circumference', which we would expect to be called 'perimeter'. Use fills and this info to do that new/existing comparison the permit people want sometimes.

Area on Plan: 2D Area. Self-explanatory, but note that it's different from the 3D surface area, which is coming up.

Height: Pretty obvious for most things. For roofs, it also gives the perimeter I mean circumference of the top surface. For walls, conventional roof trimming is not considered.

Surfaces: Areas of all the 3D surfaces. Note: Solid Element Ops are taken into account.

Volume: What it says. SEOs work here too. I have actually used this for a back-of-envelope cut/fill grading calculation.

This isn't really calculation, it's just inspection. To actually do anything with the data, besides write it down or copy and paste it, requires list schemes.

Update: This refers to the old version of interactive schedule, now called 'Element Schedules'. The principles are the same, but some of the names and menu commands have changed.

Zones are better than fills for area measurement because they can be updated when the walls (&c) enclosing them have moved.

(Zones are cool for so many reasons, but let's try to stay on topic.)

You can use Interactive Schedule to get the area of each story, of the rooms individually, and of the entire project.

I will describe two methods of floor area calculation: First, the gross area of each story, ignoring interior walls. Second, The total room area, or usable floor area, which will be less since the area occupied by partitions is not counted. There are different occasions to use each one.

More»

For a permit in Montgomery County, we need to do that Energy Worksheet thing, where we figure out the area of the walls and the area of the glazing, and determine the percentage of glazing. I feebly stabbed at getting this data directly from the walls, but I think it will require changes to the windows and more heavy calculation lifting than I think is warranted.

This method isn't automatic, but it's quick and reliable. It uses fills, hotlinked modules, and an Interactive Schedule. Which sounds complicated but it's not. I am offering it not as a standard but as an option, and as an example of lateral thinking. In other words, I think it's clever.

1. Draw fills on all the elevations, covering the habitable space. Use the layer Z Measurement. Cut holes in the fills for the widows and doors. Note: Doors without glazing are exempt. You don't need two fills, and you don't need to show the area.

2. In each elevation, create a module of the measurement fill. Save the modules in [Project]/1 Design/Modules/Energy Calc. When saving the modules, the name will default to the name of the section window, which is fine.

3. If you don't have a story below the footings story, create one. Use Hotlink Manager (File -> Modules & XREFs -> Hotlink Manager) to place each module on this story. They can overlap.

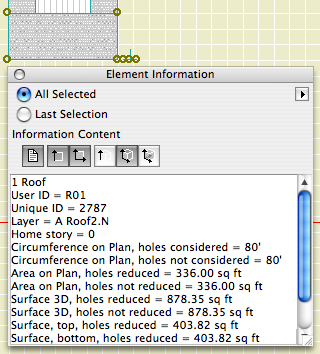
4. Select all the fills. Go to Calculate -> Interactive Schedule -> Preview. Choose the 'Energy Calc Fills' setting. You should see something like this:


5. Make a note of the two numbers. Using the Z Measurement layer, place an 'Energy Calc JM9' object (Location: Calculation RND). In the object settings, put the two numbers in. The object calculates the total wall area and the glazing percentage. You can also put in a target percentage and figure out how much glass is allowed.

You still have to look up the package number yourself.

So it's not automatic, but since the modules originate in the elevations, if you modify any of the fills you only need to update the modules and run the IS again.

The Interactive Schedule settings used by your local Archicad are saved as .iss files in ~/Library/Application Support/Graphisoft/IS Settings.

('~' means home, the house-looking folder named after you.)

But you don't actually use them there, so that's just FYI.

The standard IS settings, for the techniques I will describe here as they become available/I have time, are at 3 Resources (Onion)/Interactive Schedule. You use the IS interface to get these into your projects. Either: Calculate -> Interactive Schedule -> Settings...; or Calculate -> Interactive Schedule -> Preview..., and then the 'Import Settings From...' button. I prefer the second method; you can get from Preview to Settings but not the other way around, and I don't know why you'd fiddle with IS settings and then not want to see the schedule. (Maybe I'll just take that Settings menu item off. Let's move on.)

You can import multiple .iss's at once.

While it is possible to Change the Settings Folder, I would like explicitly forbid that you do so. Especially, don't use the 3 Resources/Interactive Schedule folder directly. If you do so and then make changes, you are Messing Things Up™. By keeping all the schedules settings local, you can mess them up all you want, as you need to, and you can always re-import the standard ones. That is, feel free to experiment.

I'll point out in passing that IS settings are handled very similarly to Work Environment schemes, and differently from attributes and library parts, and differently from conventional list schemes, which aren't library parts but are in the loaded libraries. It's really insanely complex. Maybe someday there will be a unified external asset manager for all this stuff, and the view sets too. And the display options.

For Interactive Schedule. This you can use because it's based on the Room Name Zstamp JAM9 zone stamp. All the info listed is contained in the zone stamp; that is, it can't read the floor finish from a fill or slab.

Rm#: 0.7
Room Name: 2.0
Floor Fin: 1.5
Ceiling Fin: 1.3
Base: 0.8
Crown: 0.8
Casing: 0.8
Note: 2.5

Header Text Height: 5.0
Value Text Height: 4.0
Row Height: 0.4

For Interactive Schedule. Actually, the windows this goes with aren't even officially available*, so you can ignore this. The text height and row height are good, though.

ID: 0.5
Qty: 0.4
Units: 0.8
Type: 2.5
Manuf: 0.9
Model: 1.5
Lites: 1.2
Hinge: 0.9
TG: 0.4
RO Width: 1.2
RO Height: 1.2
Mull: 0.7
Ext Casing: 1.2
Transom Height: 1.2
Transom Lites: 1.2
Location: 1.8
Note: 2.5

Header Text Height: 5.0
Value Text Height: 4.0
Row Height: 0.4

*I have no idea.

Obsolete. Use this method (zones) or this method (fills) instead.

Your first list. I'm so proud.

Calculate Menu, List Zones | FA [Something] (JAM8.lis). You can also find lists in the project map under 'Lists'.

There are several different calculations available: Rooms on each story, total rooms, garage, exterior spaces. Each is set up to include zones in the appropriate category and stories.

The list will give the area of each zone and a total. There is no way to do a subtotal by story; that's why the lists are separate. I feel your pain.

Use the 'Show Area Text' feature of the fill tool to make wall and glazing area measurements a breeze.

More»